Showing posts with label Bags. Show all posts

Wednesday, November 25, 2015

An Independent Scholar

That is what Mistress Ose calls herself when contacting museums for information.  Now that I have finished my first letter to a museum requesting information about one of their items, I suppose I may use the same title.  The letter is now in the hands of someone who will translate it into French for me.

The museum, Musee-Alfred-Bonno is in Chelles, France, what looks like a small town east of Paris.  As such, I'm not going to assume their curator speaks/reads English, hence having my letter translated.  I will mail them both versions just in case I'm mistaken.

A copy of the letter follows:

Dear Sir or Madam,
I am an independent scholar who is interested in one of the items in your collection.  I am hoping you are able to tell me more about it.

I am curious about the embroidered purse pictured below.


My only information about it is what is included with the photo:
Date: 1170-1190
Material: Silk threads on linen
Size: 10 cm x 13 cm


There is much I would like to learn about it as I am interested in trying to recreate it in order to learn more about embroidery techniques of the Middle Ages.  I am hoping you will be able to provide answers to the following questions:

- First and foremost, is it possible that you could email me high-definition photographs of the front, back, and inside of the purse?
- Is the stitching truly worked with silk threads and the base material actually linen?
- Is the purse lined?  With what type of material?
- From the photo I found online, I have been unable to determine what embroidery stitches were used.  Do you have any information about this?
- The buttons on the side and the drawstrings seem to be a type of weaving over a solid disk.  Do you know the material of the disk? The type of thread used for the covering?
- Do you know what type of threads were used for the drawstrings and the carrying strap?


I thank you for your time,

To regular readers of this blog the photo of the bag will look familiar.  This is the next step in being able to reproduce the bag.

Keep your fingers crossed the letter doesn't get lost in the mail when I send it, probably in January (janvier) to avoid the Christmas zaniness in the postal system.

~ Marjorie (said with a French accent this time)

Wednesday, October 28, 2015

Nalbinding Bag

I've finished my first nalbinding project.  It's not much, but it's done and it works.

This bag is the second in my series of bags that will camouflage my anachronisms; asthma inhaler, cell phone, water bottle, very sharp scissors, etc.  I went a bit overboard on the length while talking to people at dance practice and not paying attention to how many rounds I made.


That doesn't stop it from working, though.

My next nalbinding project (hope, hope) will be a pair of mittens using the mammon stitch.  I still need to learn it and become more consistent with my tension, so don't look for them anytime soon.


Meanwhile, I'm appliqueing my device onto my cloak.


~ Marjorie


Friday, October 16, 2015

Nalbinding

I've done it.  I've joined the ranks of those who love nalbinding.  Thank you, Mistress Ose!  

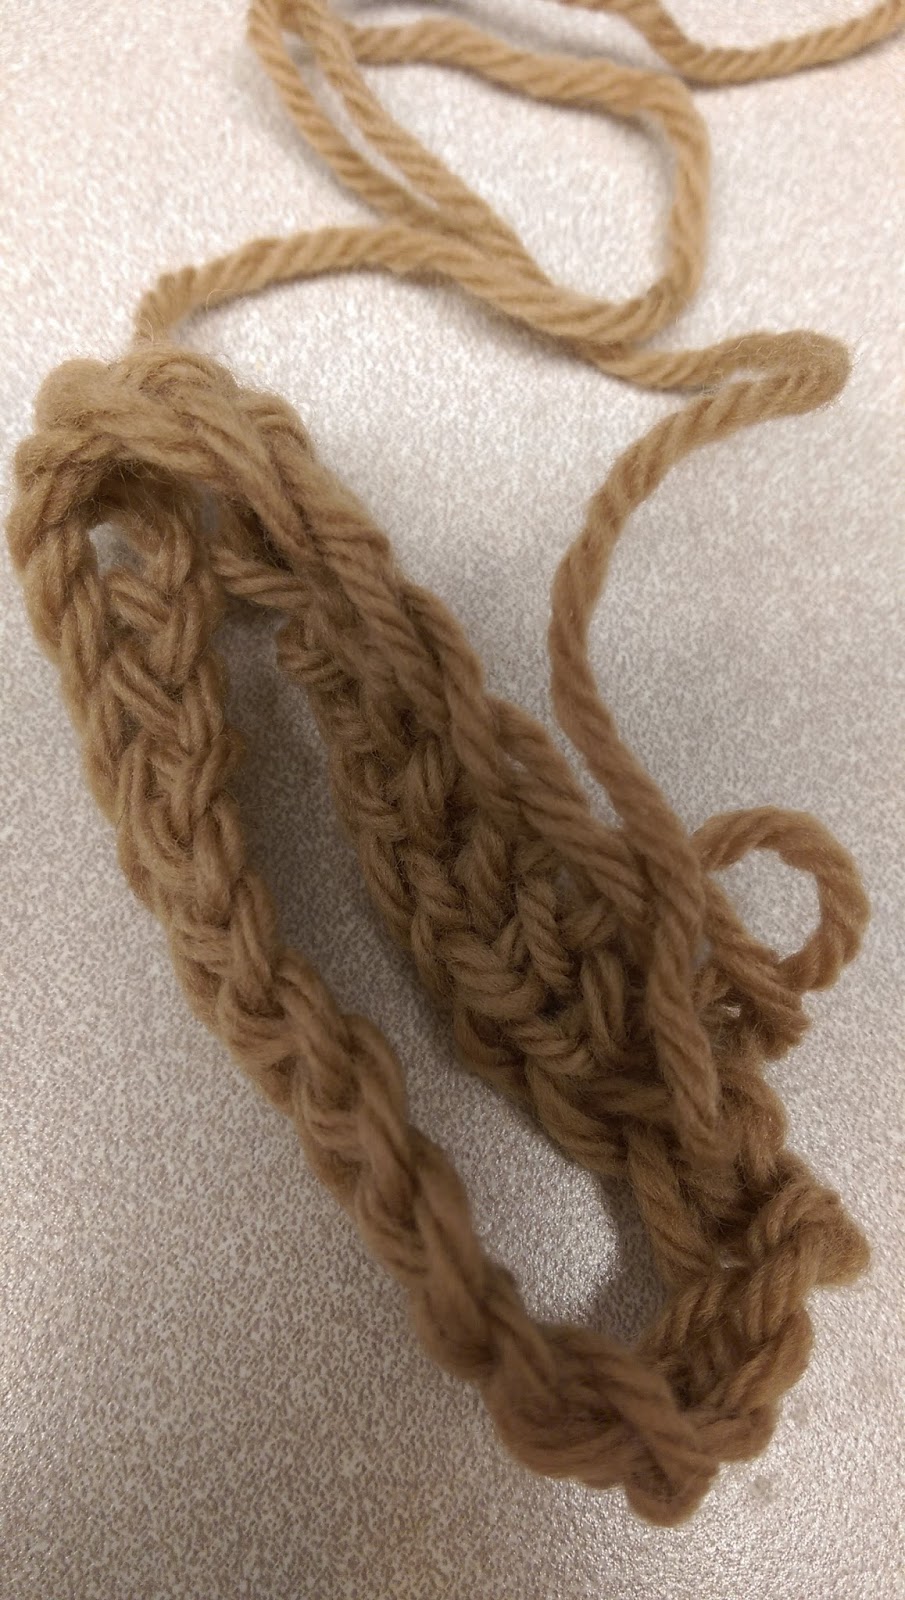
She and I and Lady Lorita Di Siena met at my house on Monday the 5th, for a beginning nalbinding lesson.  I'm hooked.  She showed us how to begin the base chain, aka "caterpillar", then the Oslo stitch.  Here is my first attempt:


Sometime afterwards, close to a week later, I tried to start an actual project, a covering for my cell-phone during events.  I started just fine, made my caterpillar, then connected it to start my second row.  It took only a few stitches to realized I'd made the basic blunder of twisting my caterpillar.

Pits.

It took me two more tries to understand that what was intuitively to me the top of the caterpillar was actually the bottom.  Now I'm cooking.  I continued with the one I successfully connected and went around using what I thought was the Oslo stitch.  But it looked different, with a ridge instead of smooth.  Humph.  I put it down until I could research it some more, like by checking Ose's blog (www.osesilverhair.blogspot.com).  She had mentioned to Lorita and I that she had a handout from one of her classes there we could reference.

I didn't get around to doing that until yesterday, just before I showed my niece how to do this cool, medieval/viking craft.  So only a ten days after I first learned the basics, I was teaching them to my first student.

 Jenny making her caterpillar.  She's excited about having something to do while recovering from ankle surgery.

Here's the piece I made while teaching Jenny, with properly made Oslo stitches. 

We were back home last night in time for dance practice.  While there I worked on the cell phone case.  I completed one round of the ridged stitch and then the subsequent with Oslo.  I may add another round of ridges for decoration, as it looks kinda cool.  What do you think?


~ Marjorie

A knotty solution ... NOT!

Pondering bags again.  Specifically the sliding closures on the drawstrings of the German bag.

A Google search for "reliquary bags" brought me to this page, http://www.larsdatter.com/pouches-drawstring.htm which led me to the Belgian Art Tools and Links site, http://balat.kikirpa.be/search_all.php.  The recommended search for "bourse" resulted in pages of items, some of which were actually what I wanted.  The photos of bags in the rest of this post are from this site.

 I noticed a series of bags which had some sort of woven object on the drawstrings that looked like it would slide up to keep the bag tightly closed.

Object number: 43493 http://balat.kikirpa.be/photo.php?path=M194705&objnr=43493&nr=77

 
Object number: 43477 

Object number: 43186 


The word "knot" did not occur to me until I zoomed in on one and realized it's resemblance to the knot at the end of the paracord bracelet I'd made for my husband.


I reviewed the video I used to make this knot, https://www.youtube.com/watch?v=tQ9VL2IVlFM&index=13&list=FLeqTsg8HLrOl-9iTM3zSZ3Q and it quickly became apparent that this was not the correct knot, it could never be made to slide.

I continued the hunt for the right knot back on Google, this time searching for "medieval knot", and found gold in the form of a blog post titled "Tassels&Co: Turk's head knot basics" from Medieval Silkwork: http://www.medievalsilkwork.com/2015/07/tassels-turks-head-knot-basics.html.

Now armed with a name for the knot I searched and found lots of info about it, including many descriptions and videos on making one.  The most helpful to me was this series of pages: http://www.hought.com/art.6bth.1.html.  You need to make sure you click on parts 2 and 3 to get the full instructions.

Even so, it took me many tries to find the right thing to start wrapping it around (my finger), properly decipher right-handed directions for my left-handed brain, and then shrinking it down to a more reasonable size.  Here is my first Turk's head knot:


I'll make a second and put them on the drawstrings of the brown bag, just to see how they work.

This was all a delightful side trip in the world of medieval bags, but it does nothing to help me with the conundrum of how the disks on the German bag were made. 


It's looking very much like material is wrapped around a disk of some type (metal), based on the above button.  The material seems to have worn off part one edge of the disk.  The material also seems to have the same texture at the embroidered skirt on the lady.  Could the material be covered with embroidery?  I must write the museum!

~ Marjorie 


Saturday, October 10, 2015

Bags

I have been contemplating bags, fabric sacks for carrying whatever needs to be brought along.  There is, of course, the 1170 German bag I will be reproducing when I understand the techniques involved.  Then there's something Ose told me, that when Baron Master George Emerson True was learning different stitches, he would practice them by making bags to hide his wallet, phone, and other modern devices he wanted to disguise.  Sewing bags also allowed him to work on something small and unobtrusive during court.

I was at the coronation of Brennan II and Caoilfhion II this past Saturday.  As we all know, Coronation is ALL court.  I gathered material, thread needles, scissors, etc. and started a bag during morning court.  The German bag is approximately 3" x 5" and this first bag is quadruple the size at 6" x 10", big enough to hold my fast-acting inhaler and tube.  I used brown linen, modern thread for the seams and bottom hem and Pearl Cotton for the trim and decorative stitches.

Construction proceeded thus:

- Pulled threads to straighten edges of material, keeping the selvage on one long side.
- Folded along short edge to create a piece half the original width and the same length as before.
- Sewed the seam with a running stitch using the modern thread, right sides together.
- Finger-pressed seam allowance (1/2") open.
- Turned right side out on itself so that one opening has a folded edge and the other has four raw edges.  The folded edge is the top, the other the bottom.  The bottom edges I folded in to encase the raw edges.
- While both ends were still open, sewed on a length of monks cord made with #5 Pearl Cotton


- Overcast the folded bottom edges with #8 Pearl Cotton (see above).  (I'm left-handed, hence the backwards look to my stitches for most of you.)
- Used a stab stitch because of the number of layers (8) to make a strong bottom seam to the bag, going one direction then doubling back to fill in the stitches on the other side. (see below)  This seems to be how the German bag is made.


- Lastly, overcast the folded edge at the top with #8 Pearl Cotton.

The monk's cording for the drawstrings is made and waiting for me to test my theory on how the German bag was closed...

~ Marjorie